I was originally going to do a first impressions post on the product I'm going to talk about today. But to be honest, if you guys saw what I looked like the first time I used this product, no one would ever want to buy it.
Today I'm talking about....
Younique Moodstruck 3d Fiber Lash Mascara!
Let me start off by saying that I was INCREDIBLY skeptical of this product. Younique sells its products through individual sales representatives called presenters. Buying from companies like this always makes me a bit nervous simply because there are so many scam companies out there who use sales tactics like this. It was hard for me to believe that the pictures I was seeing posted by these presenters were actual results. They are trying to make sales after all....
Nonetheless, I was extremely curious about this mascara system. After hours of watching youtube videos on this product, I decided it was time to try it out for myself.
The Younique Moodstruck 3d Fiber Lash Mascara system sells for $29. Initially, I thought it was crazy to ask that for mascara until I remembered that my usual mascara (Benefit's They're Real! mascara) costs $23.
It took me a few tries to get it right with this product which is why I did not do this post as a First Impressions Review. I ended up with fibers all over my face and super clumpy lashes. But after a few practice sessions, I fell in love!
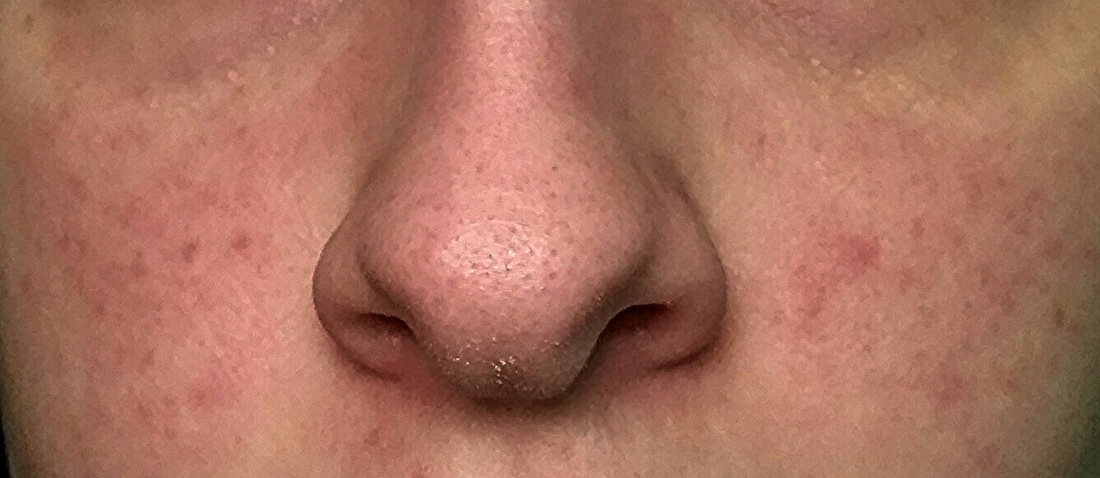
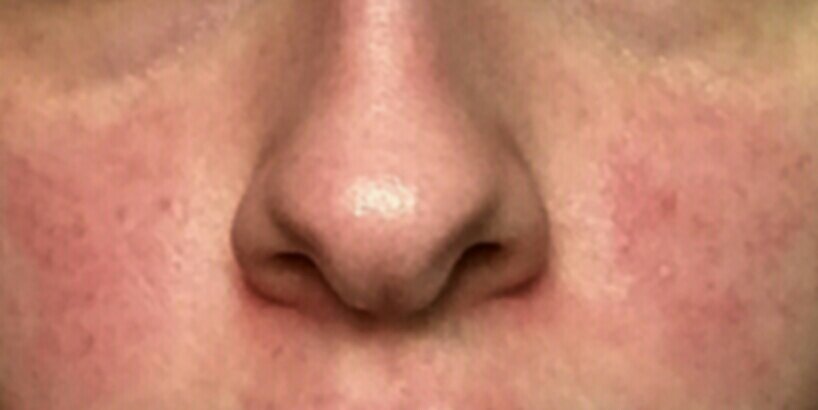
Let me show you guys what my lashes look like natural:
Today I'm talking about....
Younique Moodstruck 3d Fiber Lash Mascara!
Let me start off by saying that I was INCREDIBLY skeptical of this product. Younique sells its products through individual sales representatives called presenters. Buying from companies like this always makes me a bit nervous simply because there are so many scam companies out there who use sales tactics like this. It was hard for me to believe that the pictures I was seeing posted by these presenters were actual results. They are trying to make sales after all....
Nonetheless, I was extremely curious about this mascara system. After hours of watching youtube videos on this product, I decided it was time to try it out for myself.
The Younique Moodstruck 3d Fiber Lash Mascara system sells for $29. Initially, I thought it was crazy to ask that for mascara until I remembered that my usual mascara (Benefit's They're Real! mascara) costs $23.
It took me a few tries to get it right with this product which is why I did not do this post as a First Impressions Review. I ended up with fibers all over my face and super clumpy lashes. But after a few practice sessions, I fell in love!
Let me show you guys what my lashes look like natural:
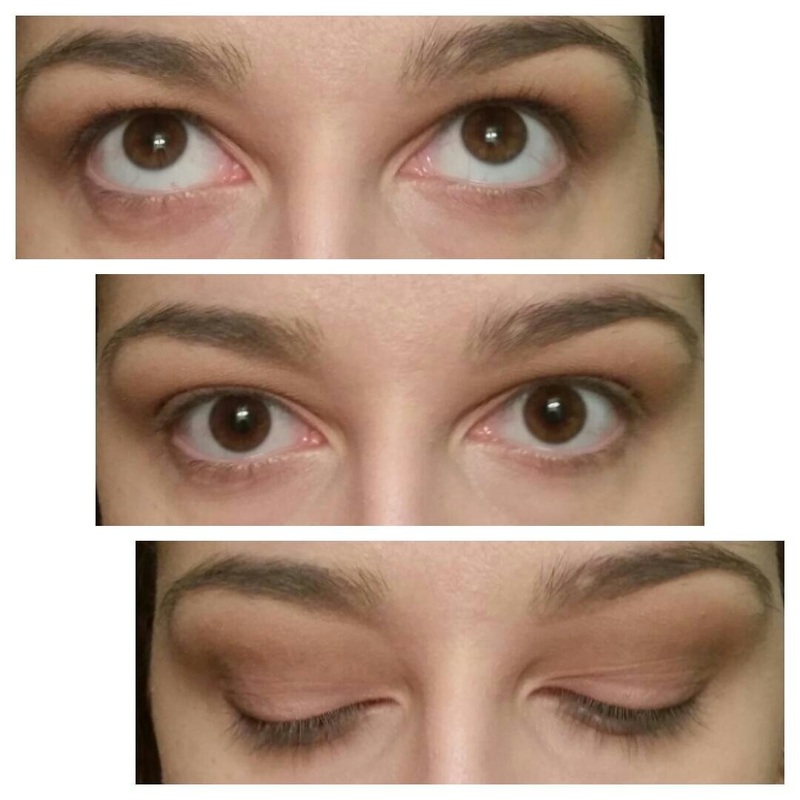
As you can see, my lashes are nothing special. They're not super curly or straight, long or short, thick or thin. I never really disliked my lashes because a few coats of any mascara is usually enough to open up my eyes. However, lately I've been noticing how awesome other people's lashes are and I wanted to find a way to make mine even better and that's what brought me to Younique.
So with all that being said, let's get straight into the tutorial!
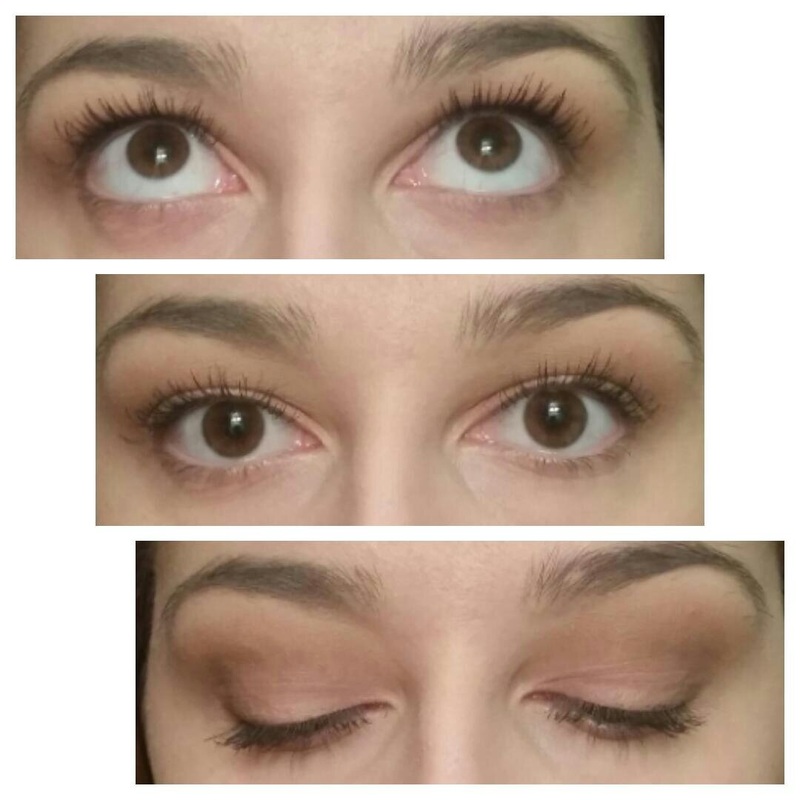
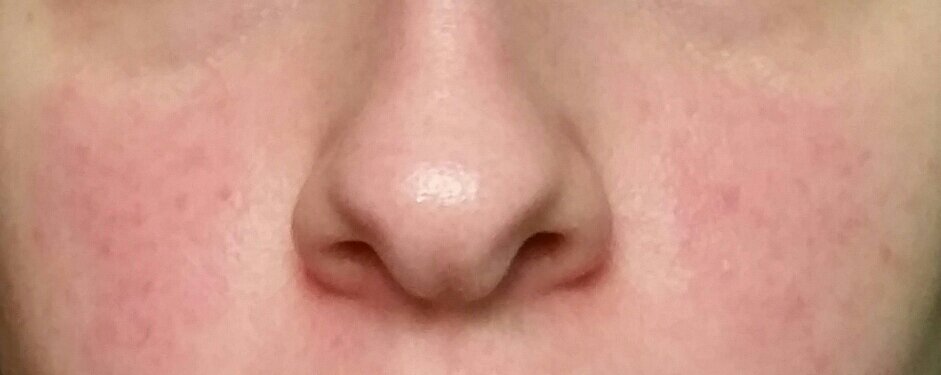
Step 1 is to coat your lashes in a thin layer of any mascara. I decided to curl mine and use Benefit's They're Real! mascara so that you all can see what my lashes look like on a daily basis.
So with all that being said, let's get straight into the tutorial!
Step 1 is to coat your lashes in a thin layer of any mascara. I decided to curl mine and use Benefit's They're Real! mascara so that you all can see what my lashes look like on a daily basis.
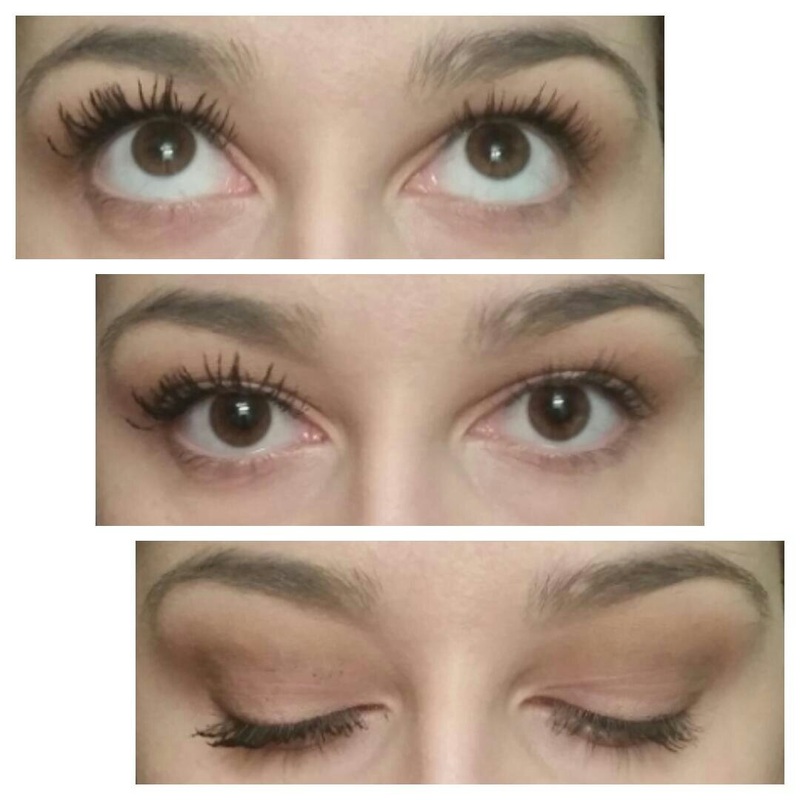
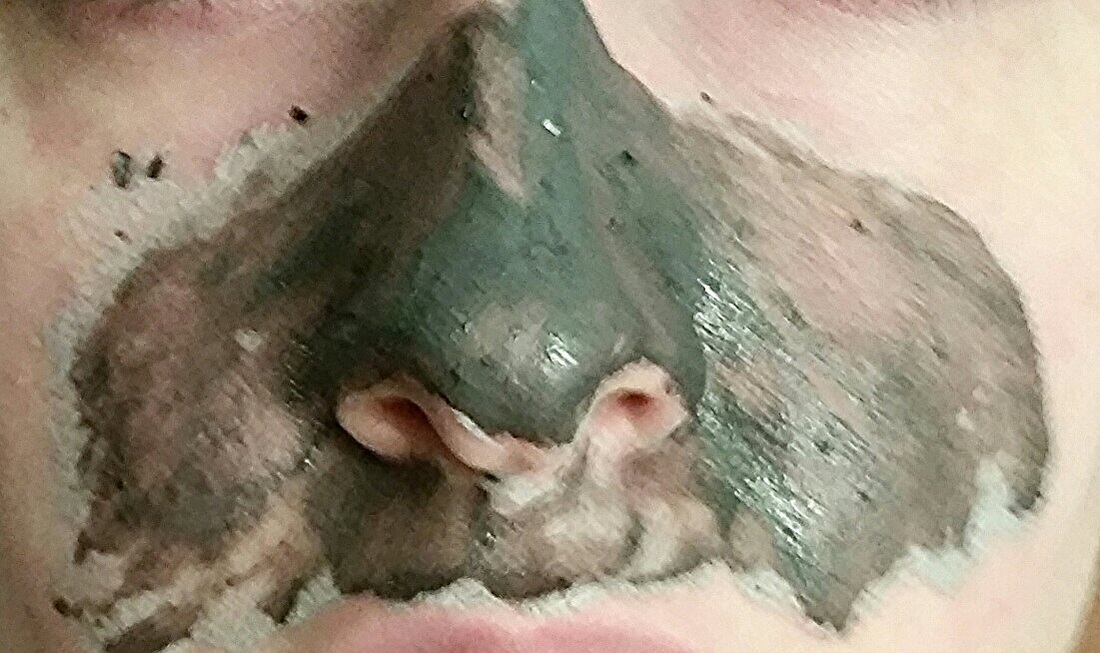
Step 2 is to apply a thin coat of the Moodstruck Transplanting Gel to the lashes. This looks like a regular black mascara but it is a bit thicker.
Step 3 is to apply the Moodstruck Natural Fibers to the lashes.
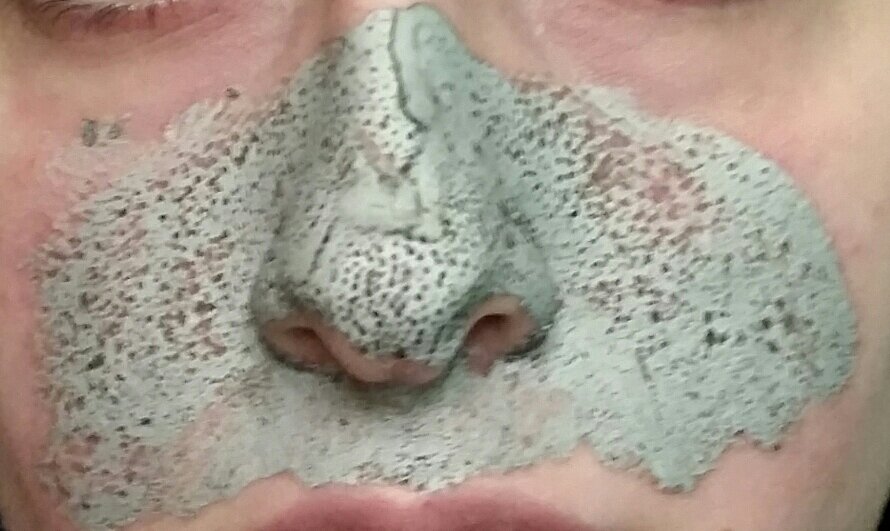
And finally, step 4 is to apply another thin coat of the Moodstruck Transplanting Gel to lock in the fibers.
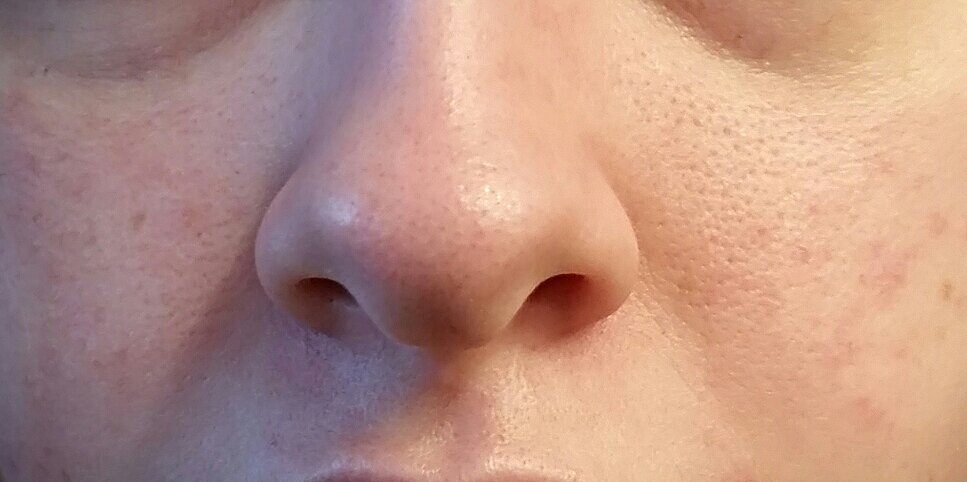
Below is a picture of one eye with the completed Younique system and the other with only the Benefit mascara.
Step 3 is to apply the Moodstruck Natural Fibers to the lashes.
And finally, step 4 is to apply another thin coat of the Moodstruck Transplanting Gel to lock in the fibers.
Below is a picture of one eye with the completed Younique system and the other with only the Benefit mascara.
Tips and tricks:
I suggest working on one eye at a time so that the transplanting gel does not have any time to dry before you put on the fibers. This way, you will get the maximum amount of fibers staying on your lashes. If the gel has already dried, the fibers won't stick and you'll get them all over your face. Not a good look....
Make sure to apply the transplanting gel from root to tip, especially on the final step, to make sure you're covering the lashes entirely. This will also help to ensure that you won't have any fallout of fibers.
Keep a clean lash brush, mascara wand, or brow brush nearby to quickly unclump your lashes if necessary.
Use the back of a business card to sheild your eyelid from getting any product on it. If you do get mascara on your lid or below the eye, simply wait for it to dry and the use a q - tip to brush off the flakes.
When applying, use a quick back and forth wiggling motion while drawing the mascara wand from root to tip. This will help prevent clumping and ensure that you thoroughly coat your lashes.
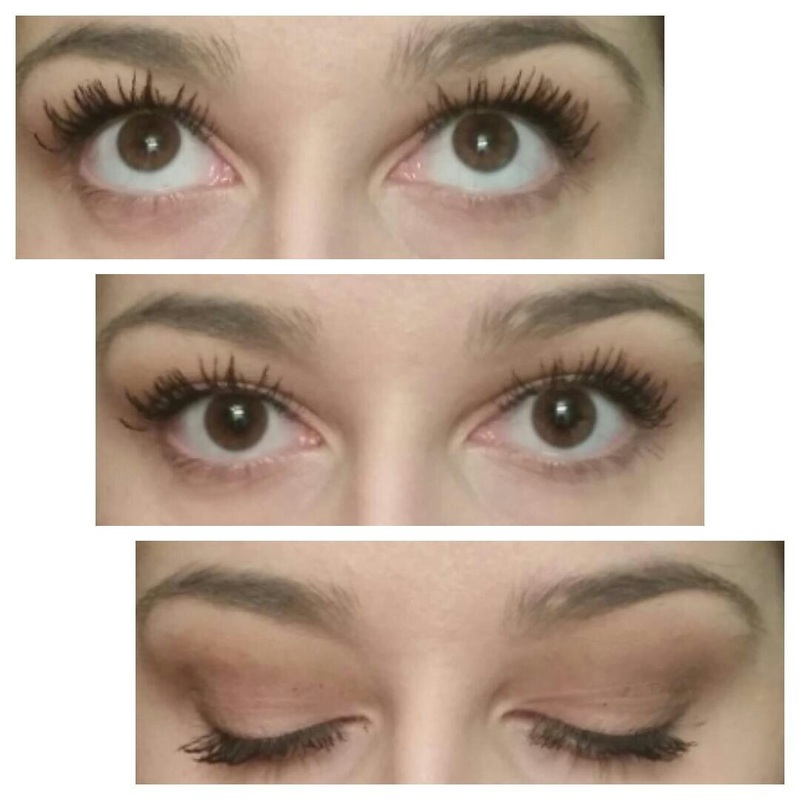
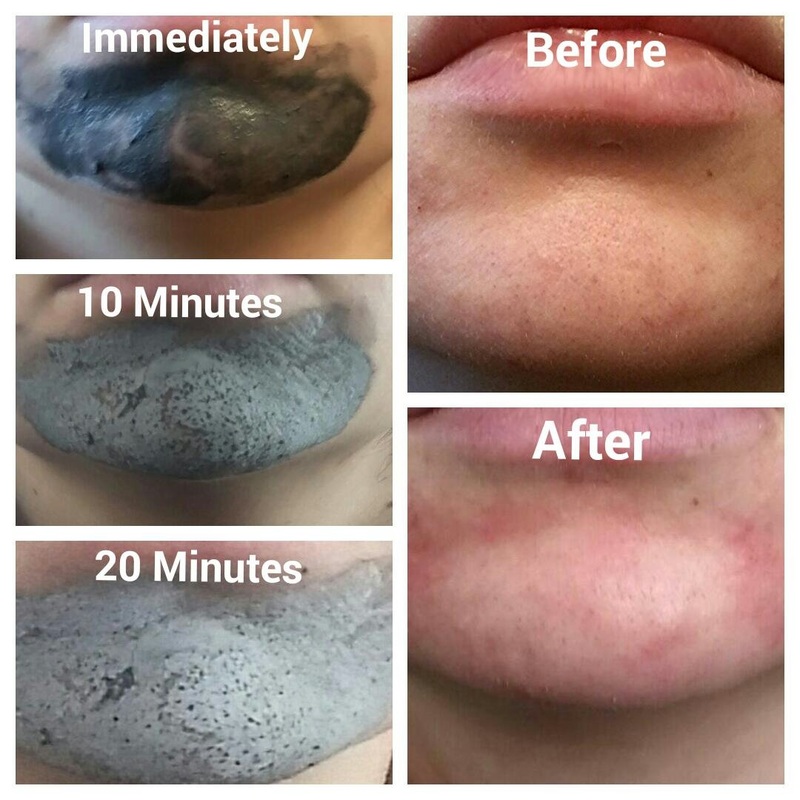
Below is a picture of both eyes with just one coat of the Younique Moodstruck 3d Fiber Lash Mascara. I haven't gone for a second coat yet because I'm afraid of them getting too clumpy. But if you decided to, just simply repeat steps 2 through 4.
I suggest working on one eye at a time so that the transplanting gel does not have any time to dry before you put on the fibers. This way, you will get the maximum amount of fibers staying on your lashes. If the gel has already dried, the fibers won't stick and you'll get them all over your face. Not a good look....
Make sure to apply the transplanting gel from root to tip, especially on the final step, to make sure you're covering the lashes entirely. This will also help to ensure that you won't have any fallout of fibers.
Keep a clean lash brush, mascara wand, or brow brush nearby to quickly unclump your lashes if necessary.
Use the back of a business card to sheild your eyelid from getting any product on it. If you do get mascara on your lid or below the eye, simply wait for it to dry and the use a q - tip to brush off the flakes.
When applying, use a quick back and forth wiggling motion while drawing the mascara wand from root to tip. This will help prevent clumping and ensure that you thoroughly coat your lashes.
Below is a picture of both eyes with just one coat of the Younique Moodstruck 3d Fiber Lash Mascara. I haven't gone for a second coat yet because I'm afraid of them getting too clumpy. But if you decided to, just simply repeat steps 2 through 4.
The first time I used this product, I was a hot mess. I had gotten the transplanting gel all over my lid and there were fibers everywhere. I was initially discouraged but I'm so glad I stuck with it and kept practicing because the results are amazing.
I definitely suggest this to anyone who loves long and thick lashes. However, if you're someone who doesn't like to look as though they have on mascara, just that their lashes are naturally long and thick, this product may not be for you (but you should check out Benefit's They're Real! mascara).
If you do decided to give this product a shot, make sure you're willing to take the time to practice because , in this case, practice definitely makes perfect!
Thank you for taking the time to check out this post. Hope you enjoyed and stay tuned for more!
Thanks,


 RSS Feed
